Quantcast
Channel: Severalnines - MongoDB
Viewing all 284 articles
Browse latest View live

A Comparison Between ClusterControl and MongoDB OPS Manager

$
0
0

There are various ways to provision MongoDB servers, e.g., manual installation by command line, configuration management tools (eg. ansible, saltstack), or specialized MongoDB deployment tools such as ClusterControl and MongoDB Ops Manager

Manual installation will usually take time to set up, as we need to type in commands manually, starting from installing dependencies, downloading the database software, installing the database software and configuring/tuning the database servers. Following the steps outlined in a how-to is not hard, the harder thing is to ensure the deployment is done the right way if it is a production system - is the configuration adapted for the hardware and workload, are the servers secured, do we understand the tradeoffs between performance and reliability when setting certain configuration parameters. 

Using configuration management software can take even longer, there is a learning curve for the automation software itself before we can use it to automate deployments in a production environment. Of course, there will be trial and error in between the testing.

Using a specialized deployment tool for MongoDB helps companies with minimum resources and knowledge of MongoDB itself to provision the database easily and efficiently. In this blog, we will compare MongoDB Ops Manager to ClusterControl from Severalnines. 

Deployment

MongoDB has various architectures, such as MongoDB Standalone, Replication, ReplicaSets, and Sharded Clusters. Those architectures require different number of servers and components. For example, a ReplicaSet will consist of at least 3 nodes, and there are also various types of Secondary nodes e.g., delayed secondary, hidden secondary.

ClusterControl supports the 3 main topologies of MongoDB, starting from a standalone node, MongoDB ReplicaSet, and Sharded Cluster. It supports MongoDB deployment from two upstream sources, which are Percona and MongoDB. The database versions supported are from 3.6 to 4.2 at the time of writing.

The deployment for MongoDB in ClusterControl requires SSH connectivity between the controller and the database nodes and the user must have sudo privileges. We need to fill the cluster name, ssh user, password, the upstream vendor, and then specify the IP addresses of the database nodes.

MongoDB Ops Manager uses agents for the deployment of MongoDB. It also supports the deployment of standalone, ReplicaSet, and Sharded Cluster. We need to install the agent on the database node first, configure the mms endpoint, mms groupId and the mms api keys. After that, we need to prepare the data directory and configure the ownership of the directory. The last thing we need to do is bring up the agent service:

$ systemctl start mongodb-mms-automation-agent.service

And we can verify that Ops Manager can connect to the agent by clicking the Verify Agent button.

In the screenshot below, we’re setting up a ReplicaSet. 

There are options for configuring parameter settings, e.g., heartbeat timeout, election timeout, write concern majority.

Both ClusterControl and MongoDB Ops Manager have similar capabilities in deploying various MongoDB topologies.

Scalability

There are two options when we talk about scalability; scale-up and scale-out. Scale-up is a process of increasing the specs of the existing server, e.g.into a bigger VM. Scale-out is the process of adding more nodes to the database cluster.

ClusterControl supports the scale-out of the MongoDB cluster. In the Cluster menu, it is enough to use the  Add Node option.

There are two options when adding a node, we can add a brand new node where the software is installed, or import an existing MongoDB server. There is an option of the node type, either it is database server or arbiter. We just need to fill in the hostname and click finish. As simple as that for adding a new node in ClusterControl.

ClusterControl also has capabilities to convert ReplicaSets and Standalone nodes into Sharded Clusters.

MongoDB Ops Manager also has a feature for scaling out an existing database cluster. When we add the new MongoDB node, there are a few options of member types we can choose from :

  • Default - the MongoDB database server node

  • Arbiter - the arbiter is a MongoDB service that does not store the data, acts only for completing the quorum of the cluster.

  • Hidden - the node will not visible from the application perspective.

  • Hidden Delayed - the hidden delayed is the node that is hidden from the application and has delayed replication based on the threshold that we configure.

Both ClusterControl and MongoDB Ops Manager can perform scale-out of the cluster by adding new nodes. The difference is that MongoDB has an option for hidden and delayed secondary.

Monitoring and Alerting 

ClusterControl has various metrics in the dashboard, there are 2 categories of MongoDB metrics which are Replicaset and Server metrics. We can see information about the connection, the WiredTiger cache, concurrent read and writes,  global locking, and some other information. We can also see the performance advisors regarding the database and operating system.

These graphs will give us visibility about the current condition of the MongoDB database. ClusterControl also provides alerts via email, or it can be integrated with external tools. 

We can specify an External Email and choose the events we want to set to deliver. ClusterControl supports alerts to various collaboration channels eg: VictorOps, Telegram, OpsGenie, Slack, or we can create our own webhook in ClusterControl.

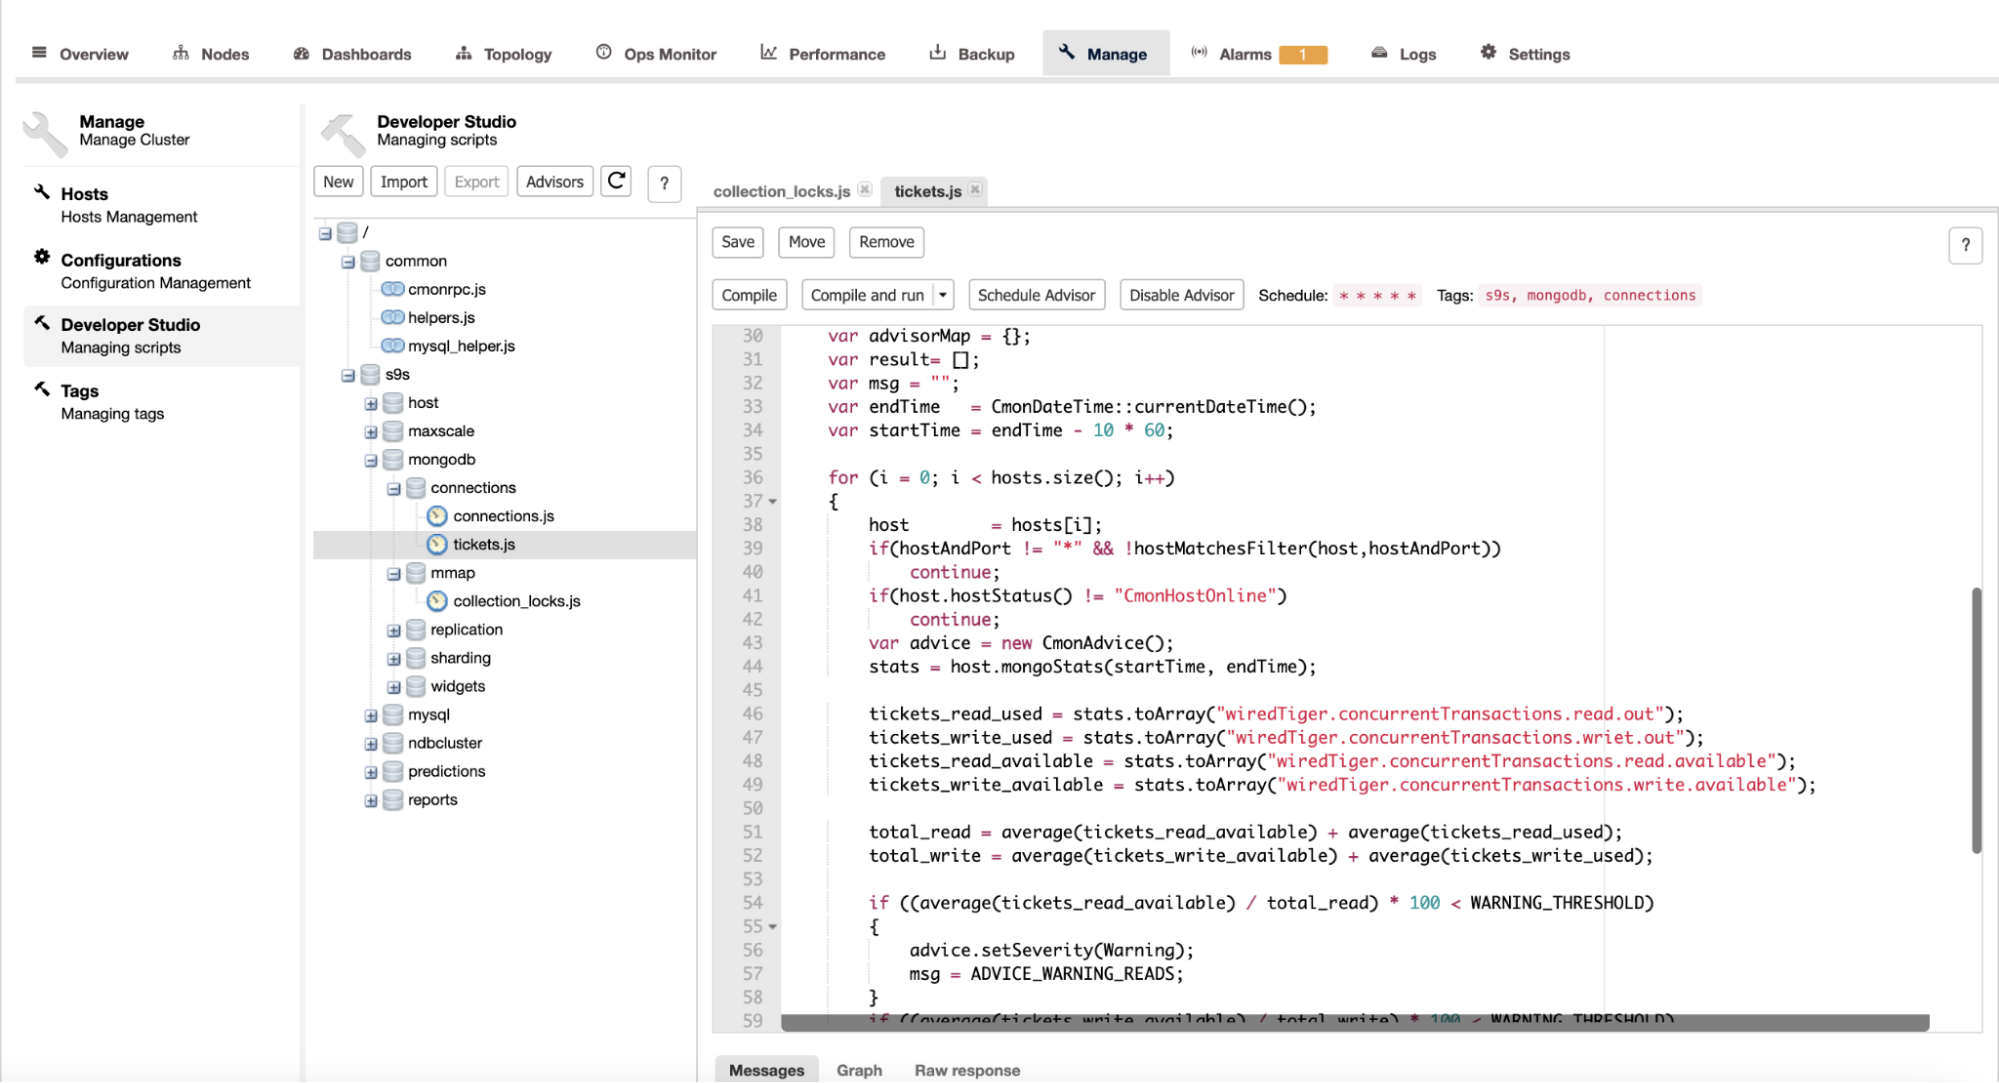
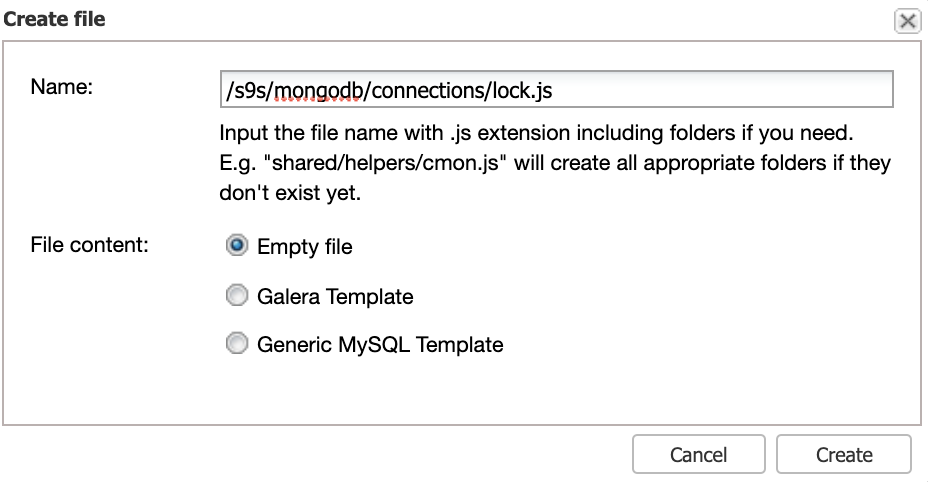
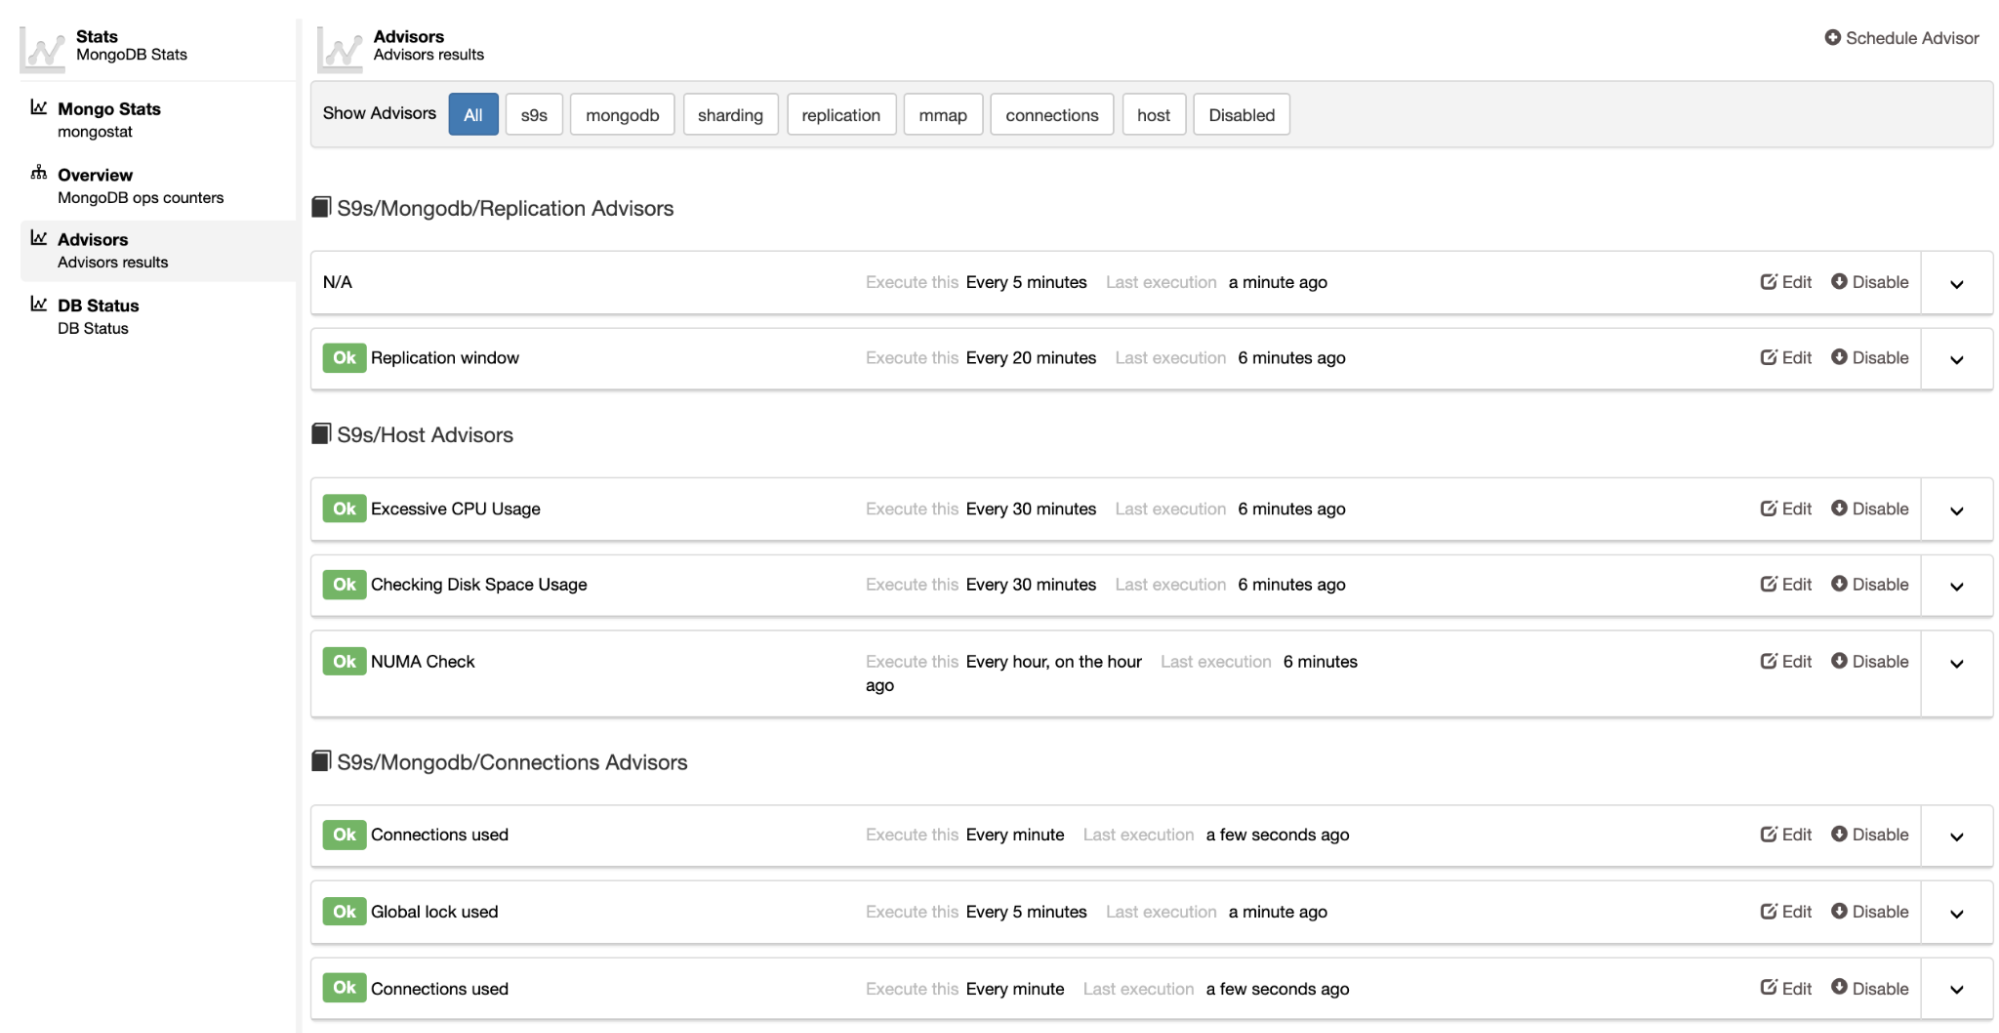
ClusterControl also provides performance advisors, which are mini programs that alert on different conditions. ClusterControl allows users to create their own custom advisors in a JavaScript like DSL language using a Developer Studio.

MongoDB Ops Manager also comes with metrics, such as database metrics, node metrics, and replication metrics. We can dig into the data if there is any performance issue in the database, and also we can configure database profiling to capture the queries and read the performance advisors.

The alert in MongoDB has a flexible setting which we can set based on certain conditions and criteria.

We can send the alert to specific roles and email too. On the integration part, MongoDB Ops Manager also has various integration options as below:

Both ClusterControl and MongoDB Ops Manager have the capability to monitor the current MongoDB database service and send the alert through the integration into the various third-party alerting applications.

Backup

Backup and restore is one of the most important tasks when managing a database. Backup is a critical aspect to tackle data loss that might lead to the disruption of business operations.

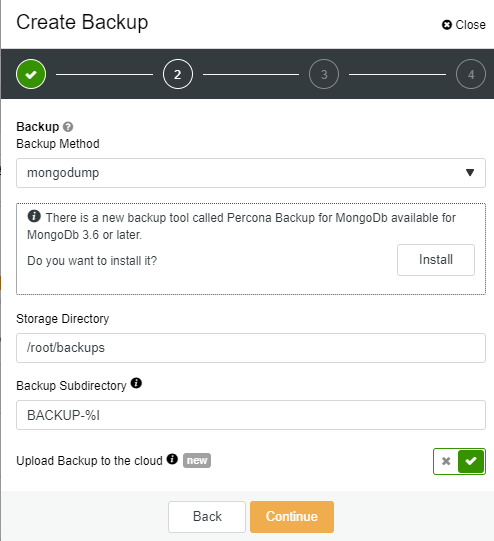
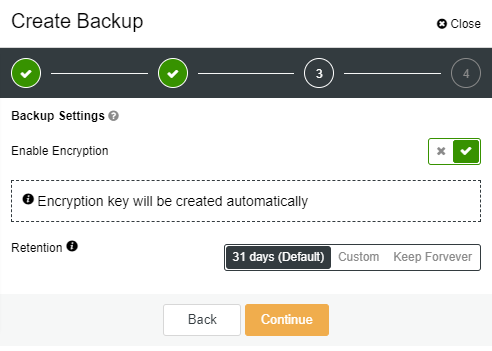
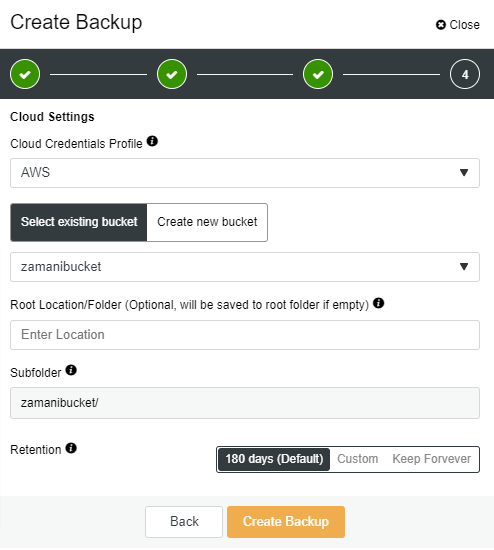
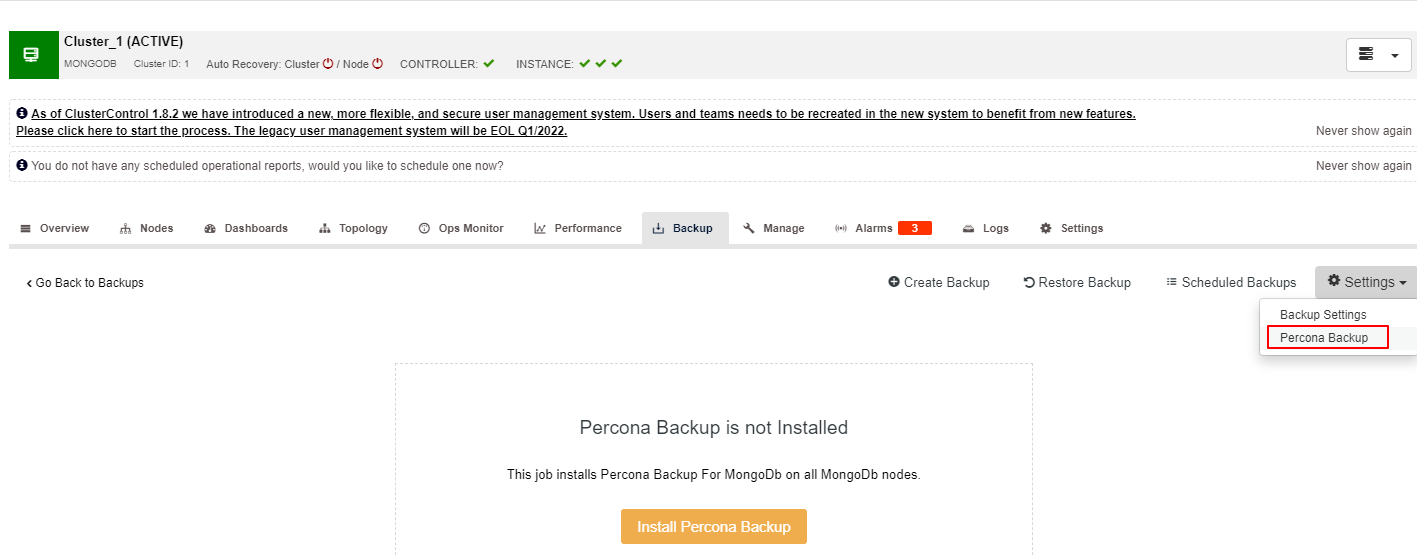
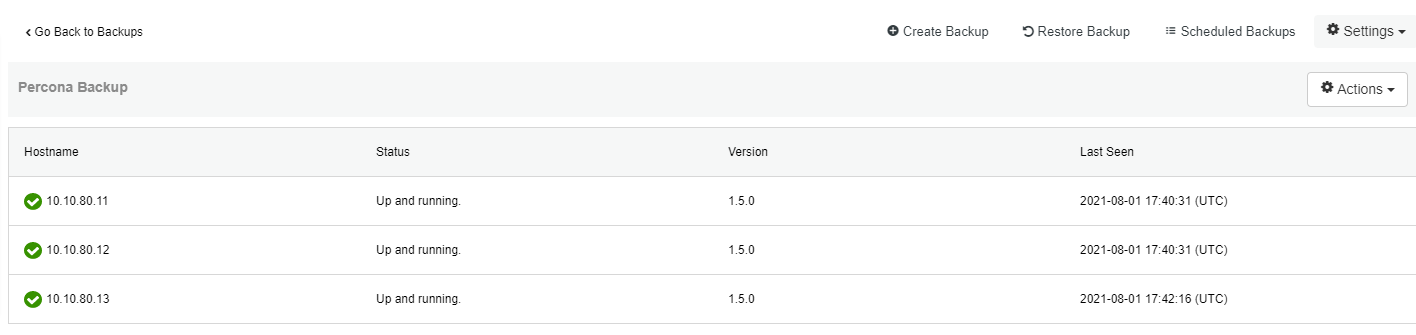
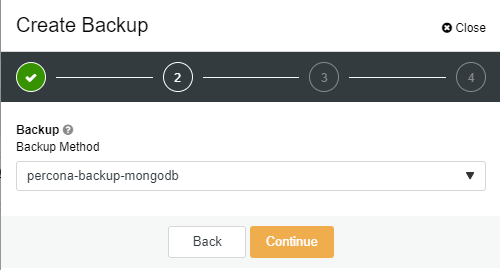
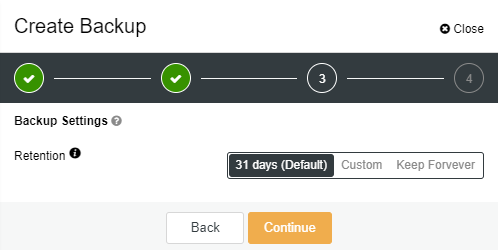
ClusterControl supports two methods of backup; mongodump and Percona Backup for MongoDB. The mongodump is a logical backup method that will take a backup for your collections, including the data and write it into the file. Percona Backup for MongoDB supports Point in Time Recovery backup for consistent backup across the MongoDB sharded clusters. This gives us the flexibility to restore based on an exact time. Percona Backup for MongoDB requires an agent called PBM Agent to be installed across the nodes and we need to have shared storage configured too.

MongoDB Ops Manager has its own built-in backup for taking the backup from source through agents. It will stream the data into the Oplog Store temporarily by the Backup Daemon. During the streaming of the backup, there is a process for watching the oplog. This is to gather the difference between the changes between the backup state and the current state of the database. The building process of backup starts when Ops Manager receives the first batch of sync and creates a local version of the backed up database which is called head database. The Backup Daemon will start inserting documents from the Oplog Store into the head database and applying oplog will apply tailed oplog entries that have already been watched into the head database. 

Support for Polyglot environments 

It is not uncommon for an application or a platform to be using other databases along with MongoDB, and these other databases also have to be managed - everything from maintaining availability, monitoring, managing backups, and so on. This is probably one of the biggest differences between ClusterControl and MongoDB Ops Manager, as ClusterControl allows its users to also automate MySQL, MariaDB, PostgreSQL, Redis, and Timescale.
 

That’s all for today. There are probably more differences that we have not covered in this post, we welcome you to share your own experiences.


ClusterControl - Advanced Backup Management - MongoDB

$
0
0

Disaster recovery does not complete without a proper backup system. When something bad happens, the data could be restored by using the backup preferably with the latest one. We might want to avoid restoring the data that is not updated. Probably there might be some information that is missing with the old backup. That is the reason why having a good backup practice is crucial for most systems nowadays.

MongoDB has become more popular year over year. There are a lot of companies started to use MongoDB as one of their databases. One of the features and probably the reason why MongoDB is popular is due to its speed and MongoDB is easy to scale. MongoDB is one of the supported databases in ClusterControl. You could deploy, import, scale and even perform the backup with ClusterControl. In this blog post, we will go through the Advanced Backup feature for the MongoDB replica set and sharded cluster.

MongoDB Backup Types

MongoDB supports both logical and physical backup. In addition to that, MongoDB also supports Point In Time Recovery (PITR). Let’s see what is the difference between all 3 types of backup.

Logical backup

mongodump

This utility will create a binary export of the contents of a database. Not only that, mongodump could export data from either mongod or mongos instances, can export data from standalone, replica set, and sharded cluster deployments

Physical backup

NA

Physical backup in MongoDB only could be done at the system level. At this time, there is no physical backup available in ClusterControl. The way physical backup works is by creating a snapshot on LVM or storage appliance.

PITR

Percona Backup for MongoDB

Percona Backup for MongoDB inherited from and replaces mongodb_consistent_backup, which is already deprecated. It is a distributed, low-impact solution for achieving consistent backups for both MongoDB sharded clusters and replica sets. This type of backup is logical but at the same time could act as a PITR backup.


Now that we know what is the difference between the backup type. 

MongoDB Backup Management

ClusterControl allows you to create the backup in realtime as well as schedule it at your desired schedule. One thing worth mentioning, in case you would like to schedule, ClusterControl will use UTC timezone. So you need to choose the right time that suits your timezone so that the schedule will run on the less busy time. 

Let’s go ahead and try to use the backup function in ClusterControl. In addition to that, we also will review one of the advanced features which is to upload the backup to the cloud. Starting with ClusterControl 1.9.0, MongoDB supports cloud upload that allows you to upload the backup to your preferred cloud storage provider.

MongoDB Logical Backup

Let’s started with logical backup. Before the feature upload the backup to the cloud could be used, you need to integrate it with your preferred cloud provider. For our case, we will integrate it with AWS cloud. To do the complete AWS integration, you may follow the following steps:

  • Use your AWS account email address and password to sign in to the AWS Management Console as the AWS account root user.

  • On the IAM Dashboard page, choose your account name in the navigation bar, and then choose My Security Credentials.

  • If you see a warning about accessing the security credentials for your AWS account, choose to Continue to Security Credentials.

  • Expand the Access keys (access key ID and secret access key) section.

  • Choose Create New Access Key. Then choose Download Key File to save the access key ID and secret access key to a file on your computer. After you close the dialog box, you can’t retrieve this secret access key again.

Assuming that you already have the MongoDB cluster ready, we will start our backup process. First, go to MongoDB cluster -> Backup -> Create Backup


On the next page, you could specify either want to enable the encryption or not. For encryption, ClusterControl will use OpenSSL to encrypt the backup using the AES-256 CBC algorithm. Encryption happens on the backup node. If you choose to store the backup on the controller node, the backup files are streamed over in encrypted format through socat or netcat. Encryption is considered as one of the advanced backup features that could be utilized, so in our case, we will enable this option. You also could define the retention period of your backup on this page. For our case, we will use the default setting of 31 days.

On the third page, you need to specify the login for the cloud provider, choose/create the bucket. You also could specify the retention for your cloud backup, the default setting is 180 days.

Once you click on the Create Backup button, the job will instantly be started and will take a while depending on your database size. At the same time, the backup will be uploaded to the cloud storage (AWS). You might notice the “key” and “cloud” icons are highlighted after the backup is completed like following:

Now that you have the backup ready, to restore the backup the step is very simple. All you have to do is by clicking on the “Restore” link and click on “Finish” button on the restore page like the following:

MongoDB PITR Backup

As mentioned earlier, Percona Backup for MongoDB is a PITR backup type. Before you could use this backup type, you need to install the agent (pbm-agent) on all of the MongoDB nodes/instances. Prior to that, you need to mount a shared directory on all nodes as well. Let’s get started!

First, you need to configure the NFS server. To install an NFS server, you need to choose or deploy any virtual machine, for our case we will install the NFS server in the ClusterControl node (Centos):

[root@ccnode ~]# dnf install nfs-utils

Once the NFS utility is installed, you may start the service and enable it at system boot:

[root@ccnode ~]# # systemctl start nfs-server.service

[root@ccnode ~]# # systemctl enable nfs-server.service

[root@ccnode ~]# # systemctl status nfs-server.service

The next step is to configure /etc/exports file so that the directory is accessible by the NFS clients:

[root@ccnode ~]# vi /etc/exports

/mnt/backups                    10.10.80.10(rw,sync,no_root_squash,no_subtree_check)

In the clients node which is our database nodes, we need to install necessary the NFS packages as well:

[root@n4 ~]# dnf install nfs-utils nfs4-acl-tools

Once the packages are installed, we may create the directory and mount it:

[root@n4 ~]# mkdir -p /mnt/backups

[root@n4 ~]# mount -t nfs 10.10.80.10:/mnt/backups /mnt/backups

Make sure to mount on all database nodes in order for us to install the pbm-agent. Considering all nodes already have the NFS mounted directory, we shall proceed to install the agent now. Go to MongoDB cluster -> Backup -> Settings -> Percona Backup

Once you click on the Install Percona Backup button, the following screen will appear. Here, you need to specify the shared directory. Again, please make sure that the directory has been mounted in all of your MongoDB nodes. Once the Backup Directory has been specified, you may click on the Install button and wait for the installation to complete.

The successful installation should be like the following screenshot. Now we could proceed with the backup process:

To create the backup using Percona Backup, the steps is simple. Unfortunately, you could not use the option to encrypt the backup using this method. In order to use the feature to upload to the cloud, you need to enable the option before choosing the backup type else your backup will be not uploaded. You will notice the upload feature will disappear once you choose “percona-backup-mongodb”.

On the second page you could specify the local retention:

As for the last page, you may specify the cloud details and retention like in the previous example. The restore process is the same as the previous example, all you need to do is to click on the “Restore” link and follow the steps on the restore page:

Conclusion

With ClusterControl, you could create and upload your MongoDB backup to the cloud. Uploading to the cloud is one of the new and advanced features for MongoDB that has been introduced starting with ClusterControl 1.9.0 providing the integration to cloud provider has been done successfully. You could also encrypt your backup using ClusterControl if you like to protect your backup.

Proactive MongoDB Monitoring (Developer Studio/Advisors angle)

$
0
0

ClusterControl has many metrics related to the database, replication, and also operating system. You can also monitor the process that runs inside the database through the opscounter in the Overview.

If you enable Agent Based Monitoring in ClusterControl, it will automatically install a prometheus database for time series database and also exporter (both mongo and node exporter) on the monitored node. After all has been setup, the Dashboard will be available for you with Cluster Overview, System Overview and also MongoDB (MongoDB Server and Replication) metrics that you can use to monitor the MongoDB database.

There is also an Ops Monitor in ClusterControl which can be used to monitor sessions inside the database.

Apart from the above mentioned, ClusterControl has capabilities to create custom Advisors through Developer Studio. In this blog, we will review Developer Studio and Advisors related to MongoDB.

Utilize Developer Studio

ClusterControl provides Developer Studio, so you can create custom Advisors related to the topic in MongoDB that you want to have advisory based on the best practices of database performance. Creating a script for custom advisors in MongoDB requires you to have knowledge in the javascript programming language, because all the advisors are written in javascript.You can access the Developer Studio through Manage -> Developer Studio, and you will be able to see the page as shown below:

We can create new advisor script by clicking on the New button, after that it will display a dialogue to fill the filename as shown below:

We will create a simple lock.js script that will be stored in the path s9s/mongodb/connections. The script collects information related to the global lock in the MongoDB. The number of high global locks will be a problem in MongoDB, because the lock is still on hold / not released yet. Below is the sample of global lock in javascript:

#include "common/helpers.js"
#include "cmon/io.h"
#include "cmon/alarms.h"

var DESCRIPTION="This advisor collects the number of global locks every minute and"" notifies you if the number of locks exceeds 90%."" This number can indicate a possible concurrency issue if it’s consistently high."" This can happen if a lot of requests are waiting for a lock to be released..";
var WARNING_THRESHOLD=10;
var TITLE="Global lock used";
var ADVICE_WARNINGS="In the past 5 minutes more than 90% of "" there could be concurrently issue in the database.";
var ADVICE_OK="The percentage of global lock is satisfactory." ;

function main(hostAndPort) {
    if (hostAndPort == #N/A)
        hostAndPort = "*";
    var hosts   = cluster::mongoNodes();
    var advisorMap = {};
    var result= [];
    var msg = "";
    var endTime   = CmonDateTime::currentDateTime();
    var startTime = endTime - 10 * 60;

    for (i = 0; i < hosts.size(); i++)
    {
        host        = hosts[i];
        if(hostAndPort != "*"&& !hostMatchesFilter(host,hostAndPort))
            continue;
        if(host.hostStatus() != "CmonHostOnline")
            continue;
        var advice = new CmonAdvice();
        stats = host.mongoStats(startTime, endTime);
        total_global_lock = stats.toArray("globalLock.currentQueue.total");
       

        if (total_global_lock * 100 < WARNING_THRESHOLD)
        {
            advice.setSeverity(Warning);
            msg = ADVICE_WARNING;
        }
        if (advice.severity() <= 0) {
            advice.setSeverity(Ok);
        }
        advice.setHost(host);
        advice.setTitle(TITLE);
        advice.setAdvice(msg);
        advisorMap[i]= advice;
    }
    return advisorMap;
}

You can save the script, compile and run. You can schedule the script in Developer Studio based on the every minute, hour the script will run.

Advisors

The Advisors give us visibility about the state of the script that we had created in the Developer Studio, the script will run and regularly check the current of global lock. If the state is below the threshold that we define, the output becomes OK, but it will appear warning if the current global lock is above the threshold. We can see on the below screenshot that the Global lock used is appear in the Advisors and the state is OK currently.

Conclusion

Developer Studio and Advisors can give you benefit to make custom Advisors based on your requirements and displayed in the ClusterControl dashboard, and ofcourse the alert too.

That’s all for today!

Best Practices for MongoDB Security

$
0
0

When it comes to managing database systems, one crucial aspect is database security. The failure to lay a good foundation for security for any database system may result in a data breach whereby a third-party intruder will have unauthorized access to it. Consequently, events like this may lead to brand reputation damage, fines and penalties for non-compliance, compromised intellectual property, or even result in the business closing.

MongoDB – the most popular NoSQL database — provides a range of tools, controls, and measures formulated to provide a foundation for the three pillars of information security — confidentiality, integrity, and availability. Data security is most often compromised at the confidentiality level due to greater usability and access.

What Types of Data Should You Protect

Like other databases, MongoDB involves two types of data:

  1. Data at rest — This is data stored in the file system disk.
  2. Data in transit — This involves data moving through a network, for example, between the database and an application.

In order to protect your data within any database, your security measures must address:

  • Data in the database files.
  • Applications associated with the database.
  • The computing and network infrastructure used to access the database.
  • The physical database server and the underlying hardware.

MongoDB Security Checklist

Before setting up your MongoDB production deployment, there is a minimum standard of security to consider to ensure your deployment will be secure. Check out the following MongoDB security checklist to

  1. Specify the authentication mechanism by enabling the access control. Before allowing access to the database, it is essential to verify user identity. MongoDB supports two mechanisms in this case: the first one is Salted Challenge Response Authentication Mechanism (SCRAM) which is the default authentication mechanism in MongoDB. It verifies supplied credentials (username and password) against the authentication database, and X.509 Certificate Authentication is used for both client authentication and internal authentication of replica set members and sharded clusters.

  2. Establish role-based access control. Every application or person having access to the database should have a unique identity created by the user administrator. Define roles with exact access rights and assign them to users who need to perform the operations.

  3. Communication between mongod, mongos, applications, and MongoDB should be encrypted. The encryption is achieved through TLS/SSL configuration.

  4. Data protection. If using the WiredTiger storage engine for data at rest, you can encrypt the data using encryption at rest. If using a different storage engine, encrypt the data using the file-system, physical or device encryption, and add the file-system permissions. Further, you can encrypt fields within documents with the Client-Side Field-level encryption before passing data from the server.

  5. Secure network of operation. MongoDB should run on a trusted network environment such that only trusted clients can have access to the network interface and ports. You can achieve this by disabling direct SSH root access and configuring the setup with security groups for inbound and outbound traffic to the MongoDB instances.

  6. Audit system activities. Keeping track of user access activities to the database is very important. The audit allows administrators to exercise proper controls and permit proper forensic analysis. Some auditing facilities like the MongoDB Enterprise provide filters for specific events such as authentication events to reduce data that needs to be analyzed.

  7. Enable secure configuration options when running MongoDB. It is advisable to limit the usage of JavaScript code supported by MongoDB such as mapReduce, $where, and  $function. You can completely disable these options using the --noscripting option. Validate input fields using modules such as mongoose. Additionally, you can use net.writeObjectCheck to ensure all documents stored by the mongod instance are valid BSON.

  8. Run MongoDB with a dedicated user. It is not worthwhile to run MongoDB on an operating system that can be accessed by multiple users. To be on the safe side, MongoDB should be run by a dedicated system user account that has permissions to access data but not unnecessary permissions that may compromise data integrity.

Poor MongoDB Security Practices to Avoid

Recently, there has been an increase in database hacking incidents, especially MongoDB. This is not because MongoDB does not meet the standards to address security concerns but rather due to the failure of developers to follow security best practices. 

MongoDB is an open-source DBMS which means some developers might know the ins and outs more than others. This does not always mean your database is at risk of external intrusion unless you fall into any of the following mistakes:

  1. Using the default ports. There is nothing wrong with using the default ports (27017 and 27018), but you might sometimes forget to set the security groups responsible for managing traffic into your system. Hackers will always try accessing the database with default ports first before trying something else. You can run MongoDB on a different port with the port option i.e $mongo –port 23456. However, the recommended way is to change the configuration in the /etc/mongod.conf file by editing the line below with your preferred port number:

    net:
    	port:27017


    MongoDB, by default, runs without authentication, which has often been an issue for new deployments that go into production. Failure to enable authentication means that anyone can access the database with ease. Always create a user with role-based access permissions to interact with the MongoDB database.

  2. Improper user credentials storage. Some developers hard code the username and password credentials into the project, and when they make them public, anyone can have access to them hence making the database vulnerable. 

  3. Failure to limit database access to known network devices. In this case, one should always limit database access to only know applications and load balancers through a whitelist. This limits the availability of the database to unknown networks that could pose a security threat.

  4. Avoiding SSL usage. SSL authentication is very crucial in ensuring that only trusted connections make it to the database.

  5. Failure to use LDAP for password rotations. LDAP ties users to a corporate directory such that when their role changes or they leave the company, the changes automatically apply to the database group. This ensures that their access to data will be limited to the role they have been reassigned to or completely limited if they leave the company.

Hardening Network infrastructure

Many times, security threats start at the network exposure level because this is the most easily accessible part to most hackers. Besides ensuring only trusted hosts have access to MongoDB, you can enhance security through network hardening. Network hardening involves two procedures in regards to MongoDB:

  1. Firewalls. Firewalls are used to limit incoming traffic from untrusted hosts that would otherwise expose the MongoDB database to external intrusion. For Windows operating systems, netsh command line interface provides access to the Windows Firewall. On Linux systems, iptables interface provides access to the underlying netfilter firewall. The firewall will filter out untrusted hosts and ensure only traffic from trusted sources can reach mongod & mongos besides creating a connection with the trusted outputs.

  2. Virtual Private Networks (VPNs). VPNs enable two networks to link over an encrypted and limited access trusted network. They do so by providing for certificate validation and a choice of encryption protocols that may require a rigorous level of authentication and all clients' identification. VPNs provide a secure tunnel; hence connections created to the MongoDB instance using VPNs can prevent tampering and man-in-the-middle attacks.

Wrapping Up

As with all open-source databases, security should be a top priority for your MongoDB infrastructure. Deploying your MongoDB database with default settings is a clear path towards a security disaster. Therefore, it’s crucial to fully understand how security within MongoDB works and follow all best practices to ensure maximum security. Most importantly, auditing user activities, such as authentication, provides a window into identifying loopholes and planning for the future before disaster strikes. 

Tools like ClusterControl help you take the guesswork out of database security and ensure that your MongoDB deployments will always follow the respective security model. With ClusterControl, you can easily configure your databases, access controls, and encryption for data at rest and in transit. If you haven’t already, download ClusterControl today and start your free 30-day trial to see how ClusterControl can help you manage and improve the security of your MongoDB database.

Viewing all 284 articles
Browse latest View live